Sunday, December 27, 2009

Daring Bakers December 2009 Challenge: Home for the Holidays


The December 2009 Daring Bakers’ challenge was brought to you by Anna of Very Small Anna and Y of Lemonpi. They chose to challenge Daring Bakers’ everywhere to bake and assemble a gingerbread house from scratch. They chose recipes from Good Housekeeping and from The Great Scandinavian Baking Book as the challenge recipes.


Thursday, November 19, 2009

Brioche


To me, brioche is like a cross between a loaf of bread and a criossant. The dough is enriched with butter, eggs, and sometimes milk. I used the recipe from Beth Hensperger's Bread Bible.
(This was only after trying Wolfgang Puck's recipe from Modern French Cooking for the American Kitchen...this book is not very well edited, I do not recommend it for the home cook! Let's just say I had a botched batch ;) )

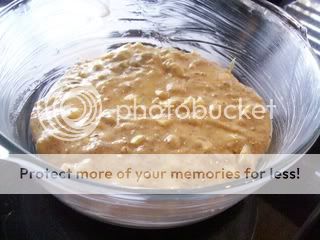
From what I have read, the key is to keep the dough cold because the butter in it needs to be kept cold. The dough is also pretty sticky. I was worried when I made this batch because I thought that it would be impossible to shape it due to stickiness, but when the time came to shape it, the dough was not as sticky and it was very easy to shape.
The brioche pictured above is a "Brioche Nanterre." This is how I shaped it:


If you stagger the dough balls, you get a more braided look in your finished brioche. I find this more appealing than lining them up straight. Since I do not own a brioche pan, I chose this way of shaping the dough.

!I can't wait to smear this stuff with butter, honey, jam, Nutella... etc!
I don't mind having leftover brioche a few days later either because it's great in french toast and bread pudding.

Brioche recipe (taken from The Bread Bible): *yield: 2 brioche nanterre

4 1/2 cups flour
1 Tbsp (1 pkg) active dry yeast
1/4 cup sugar
2 tsp salt
1/2 cup water, 120 degrees
6 eggs
1 cup (2 sticks) butter, softened but still cool and cut into small pieces

In a stand mixer w/ paddle attachment, combine 1 cup flour and all the salt, sugar and yeast.
Add the water and mix at medium high speed until smooth ( 2 mins). Add the eggs, one at a time, beating well after each addition. Gradually add 2 more cups of flour. Add the butter, one piece at a time and beat until smooth. Lastly add the remaining 1 1/2 cups of flour. (*at this point I switch to the dough hook attachment).
Pour the dough into a greased rising container, cover tightly w/ plastic wrap, and allow to rise at room temp until doubled in bulk, about 3 hrs. Once it has risen, gently deflate it by pressing on it with a spatula. Cover it and allow it to proof overnight in the refrigerator. (*8-12 hrs...although I let mine go for about 15 hours and it was fine)

Remove from the fridge and dust a work surface with flour. Grease two loaf pans. Turn the dough out onto your work surface and cut it in half (*w/ a bench scraper works best). Roll each large piece into a snake and cut each snake into 6 pieces. Shape each of those and form into balls. Place the dough balls 6 to greased loaf pans as in the photo above.
Allow to proof for 1 hour covered in plastic wrap. 20 mins prior to the hour, preheat the oven to 375.
Mix one egg yolk with 1 Tbsp whole milk and brush the dough.
Bake for 30-40 mins, turning in the oven halfway through to ensure even browning.

Sunday, November 1, 2009

The October Daring Bakers Challenge: Macaroons

The 2009 October Daring Bakers’ challenge was brought to us by Ami S. She chose macarons from Claudia Fleming’s The Last Course: The Desserts of Gramercy Tavern as the challenge recipe.


Here is the recipe:

Ingredients
Confectioners’ (Icing) sugar: 2 ¼ cups (225 g, 8 oz.)
Almond flour: 2 cups (190 g, 6.7 oz.)
Granulated sugar: 2 tablespoons (25 g , .88 oz.)
Egg whites: 5 (Have at room temperature)

Directions:

1. Preheat the oven to 200°F (93°C). Combine the confectioners’ sugar and almond flour in a medium bowl. If grinding your own nuts, combine nuts and a cup of confectioners’ sugar in the bowl of a food processor and grind until nuts are very fine and powdery.
2. Beat the egg whites in the clean dry bowl of a stand mixer until they hold soft peaks. Slowly add the granulated sugar and beat until the mixture holds stiff peaks.
3. Sift a third of the almond flour mixture into the meringue and fold gently to combine. If you are planning on adding zest or other flavorings to the batter, now is the time. Sift in the remaining almond flour in two batches. Be gentle! Don’t overfold, but fully incorporate your ingredients.
4. Spoon the mixture into a pastry bag fitted with a plain half-inch tip (Ateco #806). You can also use a Ziploc bag with a corner cut off. It’s easiest to fill your bag if you stand it up in a tall glass and fold the top down before spooning in the batter.
5. Pipe one-inch-sized (2.5 cm) mounds of batter onto baking sheets lined with nonstick liners (or parchment paper).
6. Bake the macaroon for 5 minutes. Remove the pan from the oven and raise the temperature to 375°F (190°C). Once the oven is up to temperature, put the pans back in the oven and bake for an additional 7 to 8 minutes, or lightly colored.
7. Cool on a rack before filling.

Yield: 10 dozen. I made a half recipe. For 2.5 egg whites you can guesstimate or use a food scale, 2.5 ounces of egg whites.

My variation for this Daring Bakers Challenge is Almond Macaroon with Amaretto Ganache. To make Amaretto Ganache, boil 1 cup heavy cream, remove from heat and stir in 4 oz finely chopped bittersweet* or semisweet chocolate until smooth. Add a few teaspoons of Amaretto to taste. Put the ganache in the freezer for 10 mins, stir, and spread on the cookies. If the ganache is still too runny simply return it to the freezer for another 5 or so minutes.


*Since these cookies are very sweet I recommend bittersweet chocolate.

Tuesday, October 13, 2009

Huguenot Torte from The New York Times Magazine


This recipe was in the Sept 13, 2009 issue of the NYT Magazine. It was a reprint from a 1965 issue. It's divine. That's all you need to know. So just bake it!!!

------Ingredients:-----

2 eggs

1/2 tsp salt
1 1/2 c sugar
1 cup peeled and chopped tart apples

1 cup coarsely chopped pecans
1 tsp vanilla extract
4 Tbsp all purpose flour
2 1/2 tsp baking powder

1 cup whipped cream barely sweetened and flavored w/ 1 tsp almond extract *we used sour cream, which was fantastic because it offset the extreme sweetness of the torte. You could also use creme fraiche.

-----Directions:
-----


1. Preheat oven to 325
2. Beat eggs and salt with rotary beater until light and fluffy. Gradually add sugar.
3. Fold in apples and pecans. Add vanilla, flour and baking powder.


4. Pour into well greased baking pan about 8 x 12" or 9 x 9" at least 2" deep.


5. Bake for 45 mins, until sunken and crusty. Serve warm or chilled, with whipped cream.

Serves 8.


Note: it will rise A LOT. So you need to make sure your baking dish is deep:


Wednesday, October 7, 2009

Caramel Apple Tart


I was just looking for an excuse to try out my new tart pan when I made this a few weeks ago. So I have a recipe for Wolfgang Puck's Tarte Tatin. (No, this is not the recipe pictured above). I'm actually a little afraid I will royally screw up said recipe, because it involves scorching the apple-covered top of the tart with the bottom of a hot skillet.
So I made a knock off. I prebaked a tart shell then filled with caramel sauce and topped with apple slices sauteed in butter, brown sugar, cinnamon, cloves.
If anyone out there has tried the French method for making the tart I described above, I would like to know how it turned out, thanks!

Sunday, October 4, 2009

Choux Swans


Pate a choux is the dough used to make cream puffs, eclairs, etc.
It's made by boiling water and butter together then adding flour to form a paste. Then you gradually add eggs off heat. The paste is piped onto baking sheets into desired shapes and it puffs to about 3 or so times its original size in the oven.

I piped mine into shapes to make the wings and heads of swans (note: I did not have a large plain tip, only a large star):


...then popped them in the oven:


Here are some recipes for pate a choux:

Sweet or Savory Pate a Choux by Alton Brown

Pate a Choux on eHow.com


Don't be intimidated by this French dough. It's not difficult to make at all. Just pay attention to the texture as you heat it over the stove. It starts out looking like mashed potatoes and then you'll see that it's sufficiently dried out when it pulls away from the sides of the pan and it gets shiny. After the eggs are added, it gets sticky again but forms a nice smooth paste.


Sunday, August 23, 2009

It's Easy to Make Your Own Chocolate Truffles...


Ingredients:

8 oz heavy cream
16 oz good quality dark chocolate
optional: nuts, cocoa, liquor of your choice

*note, this is a fairly large recipe, it will make several dozen. You can halve the recipe if you wish.

Directions:

Chocolate truffles are by far the easiest type of gourmet chocolate to make at home because you don't need to temper any of the chocolate. All you need to do is make ganache, cool it to a thick consistency, scoop small amounts of it with a spoon and roll it into balls and then roll them in the coating of your choice (nuts, cocoa powder, etc).

To make ganache:

You will need a 2:1 ratio of chocolate to heavy cream. For example, if you have a 1 lb bar of chocolate, you need 8 oz (1 cup) of heavy cream,
which is roughly half of a pint.
If your ganache separates (looks globby and oily), it is easy to correct. Just add a small amount of whole milk and stir and keep doing this until it is smooth. Ganache can be kept in the refrigerator for months. Keep your leftovers!

Slice the chocolate on a cutting board with a serrated knife in a straight downward motion in thin slices (approx 1/4 inch). The thinner the slivers of chocolate, the sooner it will melt.
Then boil the heavy cream in a saucepan. Turn off the heat and stir in the chocolate. It will be a consistency similar to thin frosting. That's ok, simply allow it to cool in the refrigerator, checking every 5-10 mins. When it is a little less firm than cookie dough, you are ready to make your truffles. If it gets too hard, no problem! You can just reheat it on low power in the microwave until it is the proper consistency.

*When your ganache is still soft, you can add a flavoring. Liquors work well.
Some tasty liquors are Frangelico, Amaretto, Kahlua, Framboise, Triple Sec, and Rum.
You can also use extracts, such as mint or almond. Literally any flavor that pairs well with chocolate will do! Keep adding as much as you want until you achieve your desired flavor.

For coating, I recommend processing nuts in a food processor then toasting them in the toaster oven or in a dry skillet. For the truffles pictured above, I used hazelnuts and then toasted them.
Cocoa powder makes a lovely coating if you sift it. Place your coatings in flat-bottomed dishes.
So there you have it!

Step 1. Make ganache and flavor it with desired flavoring
Step 2. Chill it to scoopable consistency
Step 3. Scoop into small balls and roll in dish of nut or cocoa powder coating.
Step 4. Place on trays to set.
Step 5. Eat and enjoy! Give to your friends!


Wednesday, August 19, 2009

Peanut Brittle


I got this recipe from my friend Melissa. It's made in the microwave and I think the cleanup was fairly easy compared to making it on the stove top. It tastes just as good too. The nuts will get slightly toasted in the microwave, so the flavor is spot on.
I've also made batches adding a little bit of chipotle chile powder or cinnamon. Either of those spices work well.


Ingredients:

1 c granulated sugar
1/2 c light corn syrup
1 cup dry roasted peanuts
1 tsp vanilla
1 tsp butter
1 tsp baking soda


Combine 1 cup granulated sugar with 1/2 cup light corn syrup and microwave on high for 3-4 minutes.

Add 1 cup of nuts, mix (although it'll be super hard to mix well), and microwave for 2 minutes. If your microwave is strong, keep an eye on it to make sure the nuts don't scorch.

Add 1 tsp vanilla and 1 tsp butter, mix and microwave 2 minutes.

Add 1 tsp of baking soda and stir well. It gets all foamy at this point but just stir until it settles down.

Spread immediately onto parchment paper, flattening with a spatula or knife to about 1/2 inch thickness. Let cool completely and then break up to serve.

Wednesday, July 8, 2009

Peanut Butter Fudge Brownies


Ingredients:

Peanut Butter Swirl...

1/2 c. chunky peanut butter
1/4 c. brown sugar
4 oz cream cheese
1 egg

Beat ingredients together at medium speed until combined. Set aside.


Brownie Batter (From Baking Illustrated)...

5 oz semisweet chocolate, chopped
2 oz unsweetened chocolate, chopped
1 stick of butter, cut into 4 pieces
3 Tbsp cocoa powder
3 large eggs
1 1/4 c granulated sugar
2 tsp vanilla extract
1/2 tsp salt
1 cup flour

Directions:
Preheat oven to 350. Spray an 8 x 8" pan w/ cooking spray, line with tin foil sprayed again if desired for ease of removal after baking.
Melt chocolate and butter over a double boiler until smooth then whisk in cocoa. Set aside to cool to luke warm.
In a large bowl, whisk together the eggs, sugar, salt and vanilla.
Whisk in the chocolate mixture. Fold the flour in with a wooden spoon or spatula. Pour into prepared pan. Drop medium sized spoonfulls of peanut butter mixture in rows across the top of the batter and slice through vertically and horizontally with a knife.
Bake for 35 to 40 mins .

The peanut butter filling is based on a recipe from Gourmet but I didn't use the butter called for in their recipe, just cream cheese. I was using Jif, which has added hydrogenated oil so I figured I could get away without the extra butter and it turned out perfectly.

Sunday, June 7, 2009

Strawberry Kirsch Cake

This is a white vanilla cake, 2 layers torted to made 4, soaked in Kirsch simple syrup, then layered with Kirsh italian meringue buttercream and sliced fresh strawberries. I made it for my friend's 30th birthday. It was not without drama though... I learned that defrosting buttercream in a bowl directly over a flame on the stove is actually a big mistake if you are a novice like me. I read it in a book. Oops ;)

I had mu
ch better luck leaving the frozen buttercream out to soften on the counter for about 15 mins then zapping it on the lowest power in the microwave for 20 seconds then stirring until it was soft enough to spread.

A great recipe for IMBC can be found here.
It's enough to max out a 5 qt stand mixer and it yields about 5 cups.

Tuesday, May 5, 2009

Meringue Class

I took a class on making meringue. It was a blast! I made these mini Baked Alaskas. Of course mine are the messy ones, and the pretty one in the back was made by our instructor. My favorite part: toasting the meringue with the torch at the very end. Our instructor shared with me a very important piece of advice: go to Home Depot to buy a welders torch w/ propane because they are a fraction of the price of the torches sold in kitchen specialty stores. Uh-oh... I shared the secret... the Williams-Sonoma police are going to arrest me!


Here are lovely examples of what my classmates made:


(Hazelnut Dacquoise with Lemon Cream and Berries)

Cookies from The Gourmet Cookbook by Ruth Reichl


Starting from the top, clockwise: Mexican Chocolate (not from Gourmet-- that's actually a recipe I sort of invented, you can find it here), Tiny Chocolate Chip Cookies, Brown Sugar-Ginger Crisps, and lastly Anise-Scented Fig and Date Swirls.

The Tiny Chocolate Chip Cookies Recipe was (not surprisingly) very easy to make. These little babies are suuuuuper tasty. Tastier than regular chocolate chip cookies... I think it has something to do with the extra saltiness. I love, love, LOVE this recipe. I dream about a cereal bowl full of these cookies and a pint of 2% milk. Does "Cookie Crisp" ring a bell? Well this is that stuff... but, you know, ten billion times better!

The Brown Sugar-Ginger Crisps were also easy to make. I can think of several different flavors of sorbet and ice cream that I would like to see these cookies on top of: lemon, lime, honey, cinnamon, chocolate, pear, scallion... ;) Here is the recipe.

The Anise-Scented Fig and Date Swirls were a bit more of a nuisance, shall we say. Any rolled cookie that needs to be sliced at 1/3 of an inch thick is a pain in the rear, I don't care how chilled your dough is. I recommend using dental floss, as you would with cinnamon rolls. Do this as quickly as your can. I'm sure there is a better way of doing it but I'm an amateur, and this way worked really well for me. Any suggestions for technique are greatly appreciated! Also, I don't recommend wrapping the dough in wax paper to roll. I actually had better luck with plastic wrap, rolling on a granite counter top. The wax paper tore as I rolled the dough and I was not a happy camper. But these cookies look cool and they taste great too, kind of like a sophisticated Fig Newton.

Wednesday, April 8, 2009

All Star Birthday Cake

Kate's Birthday Cake:


Devils Food with Mocha Buttercream frosting and fondant decorations... what I learned from this experience: mixing luster dust with vodka to paint on bow pieces looks REALLY MESSY... hence why you don't see shiny gold bow pieces on this cake. My new obsession: buying an airbrush for cake!!


dum da da daaaaaaaaaaaa...the presentation!


now... will someone buy me an airbrush for MY birthday? :)

Tuesday, March 31, 2009

Fondant...


So I made a cake with fondant the other night...and it sort of looks like an Easter Sunday hat worn by some old lady in the flower arranging club, but whatever :)

Sunday, March 1, 2009

Daring Bakers Blog Challenge: Flourless Chocolate Cake

***The February 2009 challenge is hosted by Wendy of WMPE's blog and Dharm of Dad ~ Baker & Chef.
We have chosen a Chocolate Valentino cake by Chef Wan; a Vanilla Ice Cream recipe from Dharm and a Vanilla Ice Cream recipe from Wendy as the challenge.


For my version of the flourless chocolate cake, I used a 50/50 blend of semisweet chocolate and bittersweet chocolate and decorated it with toasted pecans. It was great with either butter pecan ice cream or coffee ice cream. It's really easy to make. Only 3 ingredients!!!


Recipe:

"Chocolate Valentino"
Preparation Time: 20 minutes

16 ounces (1 pound) (454 grams) of semisweet chocolate, roughly chopped
½ cup (1 stick) plus 2 tablespoons (146 grams total) of unsalted butter
5 large eggs separated

1. Put chocolate and butter in a heatproof bowl and set over a pan of simmering water (the bottom of the bowl should not touch the water) and melt, stirring often.
2. While your chocolate butter mixture is cooling. Butter your pan and line with a parchment circle then butter the parchment.
3. Separate the egg yolks from the egg whites and put into two medium/large bowls.
4. Whip the egg whites in a medium/large grease free bowl until stiff peaks are formed (do not over-whip or the cake will be dry).
5. With the same beater beat the egg yolks together.
6. Add the egg yolks to the cooled chocolate.
7. Fold in 1/3 of the egg whites into the chocolate mixture and follow with remaining 2/3rds. Fold until no white remains without deflating the batter.
8. Pour batter into prepared pan, the batter should fill the pan 3/4 of the way full, and bake at 375F/190C
9. Bake for 25 minutes until an instant read thermometer reads 140F/60C.
Note – If you do not have an instant read thermometer, the top of the cake will look similar to a brownie and a cake tester will appear wet.
10. Cool cake on a rack for 10 minutes then unmold.


* Notes on this recipe: Not necessary to use the same beater to beat the yolks together. I don't know why the recipe is written this way. Just whisk them in a separate bowl. You'll need to keep your whites in the bowl of the Kitchenaid.
Also, when I baked mine for 25 mins, it came out at 170 Fahrenheit.
If you want more sophisticated flavor, use some bittersweet chocolate!!

Saturday, February 21, 2009

Blueberry Lime Cobbler


Ingredients:


For the filling:
-16 - 20 oz blueberries (frozen is ok, just make sure to let them defrost at room temp for best results. If you use frozen, set the berries in a colander over a bowl to catch the juices as they defrost, then reduce the juice in a small saucepan over medium heat until slightly thickened, add this to the filling mixture)
-Grated zest of 1 lime + 1 tsp juice
-1/3 c sugar
- 1 Tbsp cornstarch
- pinch of cinnamon

For the Topping:
- 1 c flour

-1/4 tsp salt
- 1 1/2 tsp baking powder
- 1/2 tsp baking soda
1/4 c sugar
-1/3 c lowfat milk mixed with 1-2 tsp lime juice (whatever is left over from the lime you zested)
- 1/2 stick of melted butter
1/4 tsp vanilla extract


Directions:

Preheat oven to 375. Stir together all the filling ingredients and place in an 8" - 9" pie dish. Bake for 25 mins until bubbling. Meanwhile, in a large bowl, stir together the flour, baking soda, salt, 1/4 c sugar, and baking powder. Add the melted butter and vanilla. It should be the consistency of cookie dough.
When the berry mixture comes out of the oven, increase oven temp to 425.
With spoons or a 2 oz scoop, evenly distribute the dough on top of the blueberry mixture. Bake for 15 mins more, until slightly golden brown on top. Allow to cool 15 mins before serving.


This is my take on "The Best Recipe" version of blueberry cobbler... sort of by accident, because I didn't have all of the ingredients called for. Supposedly blueberry, lime and honey is a flavor affinity. I agree... try this recipe with honey drizzled on top.


Tuesday, January 6, 2009

Daring Baker's January 2009 Challenge: Tuiles


This month's challenge is brought to us by Karen of Baking Soda and Zorra of 1x umruehren bitte aka Kochtopf.
They have chosen Tuiles from The Chocolate Book by Angélique Schmeink and Nougatine and Chocolate Tuiles from Michel Roux.


I used the recipe from The Chocolate Book:

Recipe: Yields: 20 small butterflies/6 large (butterflies are just an example) Preparation time batter 10 minutes, waiting time 30 minutes, baking time: 5-10 minutes per batch 65 grams / ¼ cup / 2.3 ounces softened butter (not melted but soft) 60 grams / ½ cup / 2.1 ounces sifted confectioner’s sugar 1 sachet vanilla sugar (7 grams or substitute with a dash of vanilla extract) 2 large egg whites (slightly whisked with a fork) 65 grams / ¼ cup / 2.3 ounces sifted all purpose flour 1 table spoon cocoa powder/or food coloring of choice Butter/spray to grease baking sheet Oven: 180C / 350F Using a hand whisk or a stand mixer fitted with the paddle (low speed) and cream butter, sugar and vanilla to a paste. Keep stirring while you gradually add the egg whites. Continue to add the flour in small batches and stir to achieve a homogeneous and smooth batter/paste. Be careful to not overmix. Cover the bowl with plastic wrap and chill in the fridge for at least 30 minutes to firm up. (This batter will keep in the fridge for up to a week, take it out 30 minutes before you plan to use it). Line a baking sheet with parchment paper or grease with either butter/spray and chill in the fridge for at least 15 minutes. This will help spread the batter more easily if using a stencil/cardboard template such as the butterfly. Press the stencil on the bakingsheet and use an off sided spatula to spread batter. Leave some room in between your shapes. Mix a small part of the batter with the cocoa and a few drops of warm water until evenly colored. Use this colored batter in a paper piping bag and proceed to pipe decorations on the wings and body of the butterfly. Bake butterflies in a preheated oven (180C/350F) for about 5-10 minutes or until the edges turn golden brown. Immediately release from bakingsheet and proceed to shape/bend the cookies in the desired shape. These cookies have to be shaped when still warm, you might want to bake a small amount at a time or maybe put them in the oven to warm them up again. (Haven’t tried that). Or: place a bakingsheet toward the front of the warm oven, leaving the door half open. The warmth will keep the cookies malleable. If you don’t want to do stencil shapes, you might want to transfer the batter into a piping bag fitted with a small plain tip. Pipe the desired shapes and bake. Shape immediately after baking using for instance a rolling pin, a broom handle, cups, cones….

Obviously I didn't make the butterflies. Instead I made a tuile cup and filled it with coconut ice cream, topped with toasted sweetened coconut and drizzled with honey. Oh, and by the way, the practically neon pink cookie was made by taking a few tablespoons of batter and mixing with a few drops of red food coloring. Yes, it is shockingly pink. Not exactly my intention, but what the heck. I need to tackle this recipe again because my cookies came out really bubbly... probably because I got a little too happy with the Kitchenaid.
The tuiles are easy to shape. I made a stencil out of thin cardboard and spread the batter with an offset spatula:


I baked three at a a time. When I took them out of the oven, I scraped them off the parchment-covered baking sheet CAREFULLY with the spatula and draped them over upside down juice glasses. To make a big enough cup for a scoop of ice cream you need to make them at least 5 inches in diameter.
This recipe is delicious!! The tuiles themselves are so so yummy and vanilla-y, you will enjoy them without any extras.