Sunday, May 9, 2010

Mushrooms...

You can peel a portabella mushroom to give it a cleaner appearance:


This is desirable for use in recipes because it makes the mushrooms look better and it also removes any dirt clinging to the surface of the mushroom.
To remove the gills, scrape the underside of the mushroom with a spoon. This is an important step, because the gills are very dark brown and they will destroy the visual appeal of your dish if you leave them on the mushrooms.


I was using portobello mushrooms in a recipe for Hungarian Mushroom Soup that I got in culinary school.
The recipe is as follows:

1/2 c. dried porcini mushrooms (.5 ounces), soaked in warm water
1 cup onion, diced
1 Tb garlic, chopped
4 Tb butter
1 lb portabella mushroom caps, gills removed and diced
1 Tb Hungarian Paprika
4 Tb flour
4 c. chicken stock
1/2 cup parsley, chopped
salt and freshly ground pepper
1 cup sour cream or creme fraiche as garnish

1. Scoop the porcini out of the water and chop. Strain the liquid through a cheese to remove the grit cloth and retain the liquid.

2. In a saucepan, melt the butter and saute the onions in it until translucent and then add the garlic. Continue to cook until softened.

3. Add portobellos and porcini. Season with salt. Saute until the portobellos give off liquid.

4. Stir in the paprika and flour and toast it for a minute over the heat. Pour in half of the stock and simmer until thickened and smooth. Pour in the remaining stock and porcini mushroom liquid. Simmer 20-30 minutes or until it reaches the desired consistency and add chopped parsley. Season with salt and pepper to taste. Serve with a dollop of sour cream or creme fraiche.


People in the culinary world used to think that you should never wash mushrooms before use, because they act as sponges and soak up a lot of water which could then affect the recipe. But now we know this is not true. Also, typical mushrooms used for culinary applications are not grown in manure, so you can put to rest any fears you have about this. See here: The Mushroom Lady

Friday, May 7, 2010

Back from a Blogging Break...

I haven't blogged in a while because I've been undergoing a few life changes: I started a new job and I started you know what...CULINARY SCHOOL. Finally, the time has come. I will learn how to cook using proper technique, etiquette and that certain... je ne sais quoi. (If you want to go to culinary school, be ready to use some French, and pronounce it correctly!)
Recent topics we've covered in class: fruits & spices, vegetables and herbs, knife skills, and the basics of keeping the school kitchen sanitary. (ServSafe Certification comes later).

Before I get too boring, here is an example of a fruit recipe: "Caramelized Pear Crisps" from our Fruits and Spices class

Slice 2 pears thinly using a mandolin and place them on a baking sheet covered with parchment paper (or silpat mat, which I tried later and trust me, this works a lot better). Dust with powdered sugar and bake in the oven at 175 degrees until they are sufficiently dried out, 2-3 hours.
(oh, and baking times go out the window in the professional culinary world. Ask the Chefs teaching at culinary school, and they will tell you, the food is done... when it's done).


Among other recipes made during that class were bananas foster, peach fritters, filled baked apples, fruit compote, guacamole, blueberry cobbler, grilled chicken with spiced kumquat chutney, poached pears, strawberry rhubarb sorbet, fruit and spice granola,passionata smoothie, mango-tomatillo salsa, fried plantains and prosciutto and brie sandwiches with rosemary fig confit. So we traveled across the spectrum of ways to cook fruit, from sweet to savory.
A few random facts about fruit:
  • When cutting and preparing fruits that turn brown, such as apples and pears, place the slices in a solution of lemon juice and water as you go to prevent browning.
  • Freezing fruit works better if there is some sugar in the fruit to protect cell walls against ice crystals (as fruit freezes, the water content expands into ice crystals and breaks cell walls).
  • Melons are in the squash family, except for watermelon.
  • Tropical fruits contain bromelain, which prevents gelatin from congealing, so you need to boil the fruit for all gelatin applications in desserts.
  • An avocado only gets ripe after picking
  • Fruits that never ripen after they are picked are soft berries, cherries, grapes, citrus, watermelon, and pineapples. So be choosy when you are shopping for these items.
Now to talk about spices...
I learned that Mace is actually the outer covering of Nutmeg. (Seems a little obvious, since mace is so similar to nutmeg...)
The shelf life of spices is basically a year. Whole spices last longer than ground spices, so if you are buying spices for your home kitchen, stick with small quantities and purchase whole spices when you can and grind them yourself when ready to use.


Sunday, December 27, 2009

Daring Bakers December 2009 Challenge: Home for the Holidays


The December 2009 Daring Bakers’ challenge was brought to you by Anna of Very Small Anna and Y of Lemonpi. They chose to challenge Daring Bakers’ everywhere to bake and assemble a gingerbread house from scratch. They chose recipes from Good Housekeeping and from The Great Scandinavian Baking Book as the challenge recipes.


Thursday, November 19, 2009

Brioche


To me, brioche is like a cross between a loaf of bread and a criossant. The dough is enriched with butter, eggs, and sometimes milk. I used the recipe from Beth Hensperger's Bread Bible.
(This was only after trying Wolfgang Puck's recipe from Modern French Cooking for the American Kitchen...this book is not very well edited, I do not recommend it for the home cook! Let's just say I had a botched batch ;) )

From what I have read, the key is to keep the dough cold because the butter in it needs to be kept cold. The dough is also pretty sticky. I was worried when I made this batch because I thought that it would be impossible to shape it due to stickiness, but when the time came to shape it, the dough was not as sticky and it was very easy to shape.
The brioche pictured above is a "Brioche Nanterre." This is how I shaped it:


If you stagger the dough balls, you get a more braided look in your finished brioche. I find this more appealing than lining them up straight. Since I do not own a brioche pan, I chose this way of shaping the dough.

!I can't wait to smear this stuff with butter, honey, jam, Nutella... etc!
I don't mind having leftover brioche a few days later either because it's great in french toast and bread pudding.

Brioche recipe (taken from The Bread Bible): *yield: 2 brioche nanterre

4 1/2 cups flour
1 Tbsp (1 pkg) active dry yeast
1/4 cup sugar
2 tsp salt
1/2 cup water, 120 degrees
6 eggs
1 cup (2 sticks) butter, softened but still cool and cut into small pieces

In a stand mixer w/ paddle attachment, combine 1 cup flour and all the salt, sugar and yeast.
Add the water and mix at medium high speed until smooth ( 2 mins). Add the eggs, one at a time, beating well after each addition. Gradually add 2 more cups of flour. Add the butter, one piece at a time and beat until smooth. Lastly add the remaining 1 1/2 cups of flour. (*at this point I switch to the dough hook attachment).
Pour the dough into a greased rising container, cover tightly w/ plastic wrap, and allow to rise at room temp until doubled in bulk, about 3 hrs. Once it has risen, gently deflate it by pressing on it with a spatula. Cover it and allow it to proof overnight in the refrigerator. (*8-12 hrs...although I let mine go for about 15 hours and it was fine)

Remove from the fridge and dust a work surface with flour. Grease two loaf pans. Turn the dough out onto your work surface and cut it in half (*w/ a bench scraper works best). Roll each large piece into a snake and cut each snake into 6 pieces. Shape each of those and form into balls. Place the dough balls 6 to greased loaf pans as in the photo above.
Allow to proof for 1 hour covered in plastic wrap. 20 mins prior to the hour, preheat the oven to 375.
Mix one egg yolk with 1 Tbsp whole milk and brush the dough.
Bake for 30-40 mins, turning in the oven halfway through to ensure even browning.

Sunday, November 1, 2009

The October Daring Bakers Challenge: Macaroons

The 2009 October Daring Bakers’ challenge was brought to us by Ami S. She chose macarons from Claudia Fleming’s The Last Course: The Desserts of Gramercy Tavern as the challenge recipe.


Here is the recipe:

Ingredients
Confectioners’ (Icing) sugar: 2 ¼ cups (225 g, 8 oz.)
Almond flour: 2 cups (190 g, 6.7 oz.)
Granulated sugar: 2 tablespoons (25 g , .88 oz.)
Egg whites: 5 (Have at room temperature)

Directions:

1. Preheat the oven to 200°F (93°C). Combine the confectioners’ sugar and almond flour in a medium bowl. If grinding your own nuts, combine nuts and a cup of confectioners’ sugar in the bowl of a food processor and grind until nuts are very fine and powdery.
2. Beat the egg whites in the clean dry bowl of a stand mixer until they hold soft peaks. Slowly add the granulated sugar and beat until the mixture holds stiff peaks.
3. Sift a third of the almond flour mixture into the meringue and fold gently to combine. If you are planning on adding zest or other flavorings to the batter, now is the time. Sift in the remaining almond flour in two batches. Be gentle! Don’t overfold, but fully incorporate your ingredients.
4. Spoon the mixture into a pastry bag fitted with a plain half-inch tip (Ateco #806). You can also use a Ziploc bag with a corner cut off. It’s easiest to fill your bag if you stand it up in a tall glass and fold the top down before spooning in the batter.
5. Pipe one-inch-sized (2.5 cm) mounds of batter onto baking sheets lined with nonstick liners (or parchment paper).
6. Bake the macaroon for 5 minutes. Remove the pan from the oven and raise the temperature to 375°F (190°C). Once the oven is up to temperature, put the pans back in the oven and bake for an additional 7 to 8 minutes, or lightly colored.
7. Cool on a rack before filling.

Yield: 10 dozen. I made a half recipe. For 2.5 egg whites you can guesstimate or use a food scale, 2.5 ounces of egg whites.

My variation for this Daring Bakers Challenge is Almond Macaroon with Amaretto Ganache. To make Amaretto Ganache, boil 1 cup heavy cream, remove from heat and stir in 4 oz finely chopped bittersweet* or semisweet chocolate until smooth. Add a few teaspoons of Amaretto to taste. Put the ganache in the freezer for 10 mins, stir, and spread on the cookies. If the ganache is still too runny simply return it to the freezer for another 5 or so minutes.


*Since these cookies are very sweet I recommend bittersweet chocolate.

Tuesday, October 13, 2009

Huguenot Torte from The New York Times Magazine


This recipe was in the Sept 13, 2009 issue of the NYT Magazine. It was a reprint from a 1965 issue. It's divine. That's all you need to know. So just bake it!!!

------Ingredients:-----

2 eggs

1/2 tsp salt
1 1/2 c sugar
1 cup peeled and chopped tart apples

1 cup coarsely chopped pecans
1 tsp vanilla extract
4 Tbsp all purpose flour
2 1/2 tsp baking powder

1 cup whipped cream barely sweetened and flavored w/ 1 tsp almond extract *we used sour cream, which was fantastic because it offset the extreme sweetness of the torte. You could also use creme fraiche.

-----Directions:
-----


1. Preheat oven to 325
2. Beat eggs and salt with rotary beater until light and fluffy. Gradually add sugar.
3. Fold in apples and pecans. Add vanilla, flour and baking powder.


4. Pour into well greased baking pan about 8 x 12" or 9 x 9" at least 2" deep.


5. Bake for 45 mins, until sunken and crusty. Serve warm or chilled, with whipped cream.

Serves 8.


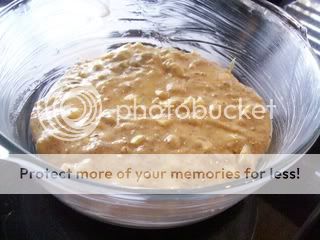
Note: it will rise A LOT. So you need to make sure your baking dish is deep:


Wednesday, October 7, 2009

Caramel Apple Tart


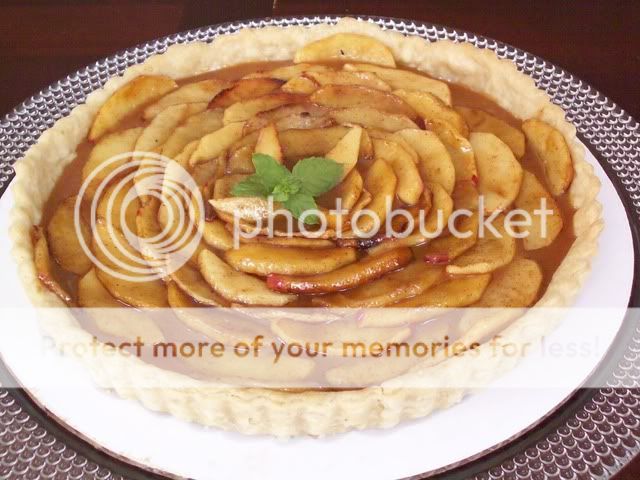
I was just looking for an excuse to try out my new tart pan when I made this a few weeks ago. So I have a recipe for Wolfgang Puck's Tarte Tatin. (No, this is not the recipe pictured above). I'm actually a little afraid I will royally screw up said recipe, because it involves scorching the apple-covered top of the tart with the bottom of a hot skillet.
So I made a knock off. I prebaked a tart shell then filled with caramel sauce and topped with apple slices sauteed in butter, brown sugar, cinnamon, cloves.
If anyone out there has tried the French method for making the tart I described above, I would like to know how it turned out, thanks!